
As part of my “mass overhaul” of the airplane I noticed a fair amount of play in the outer aileron and elevator hinges. This airplane has MS20001 hinge for all control surfaces and at the time about 700 hours on the airframe. I can assume these are original hinges from when the airplane was built in 1995. See the video below:
My number one motto when attempting something new is this: cheat first. Somebody somewhere has probably already done this and learned a few things, don’t repeat avoidable mistakes! With that in mind, I once again refer you to Chris Zavatson and his wonderful website. Chris has already documented the play and premature wear associated with MS20001 hinge. You can read about it here:
http://www.n91cz.com/HingePlay/hinges.htm
I took his advice and reamed my new hinge to 3/32″ and used stainless steel welding rod as a hinge pin. At first glance a brand new MS20001 hinge doesn’t seem that sloppy, until you correct the problem with the 3/32″ pin! Then it is VERY noticeable how much play actually existed “as new”. I would recommend everyone using this hinge on a control surface to make this modification.
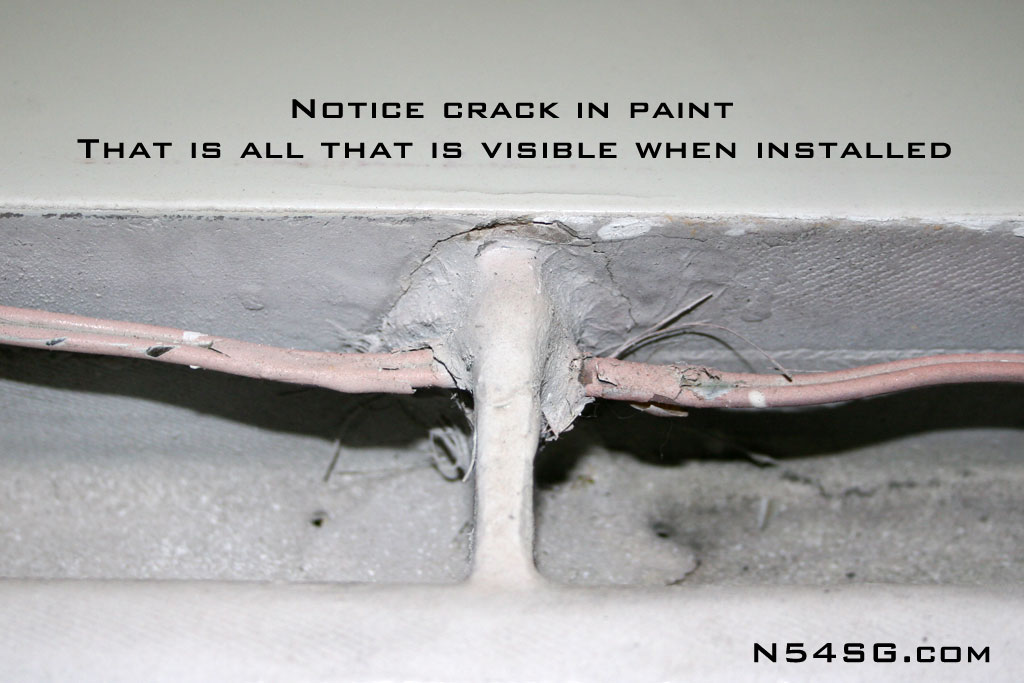
So, that covers the hinges, but let’s look at the process. I started with the ailerons because I thought I might have a developing problem. When I removed the gap seal tape I noticed a hairline crack in the paint near the leading edge of the aileron, between the 2 hinges. Hmmm
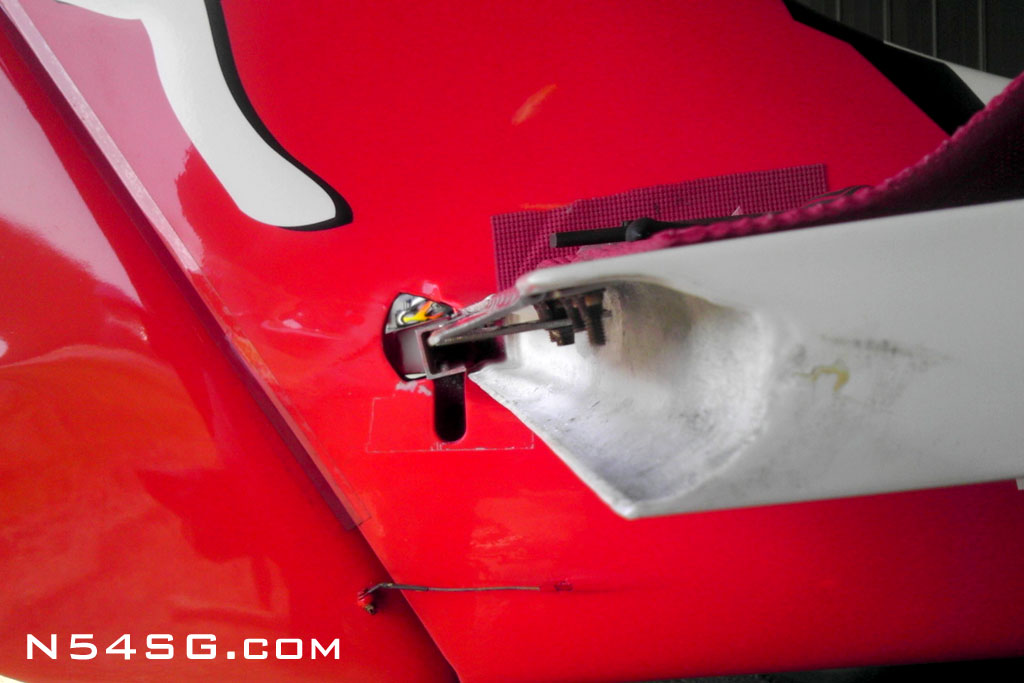
When I got them off I found a bunch of surprises! For starters, the drain holes had been painted over so the rod end bearing would have been submerged anytime it was wet. Apparently this happened enough it rusted it fairly bad. You can see where the water line was by the rusty water mark. During annual I checked this bolt and lubed it, but from the bottom you couldn’t see the rust and it never occurred to me it would be submerged. Lesson learned!


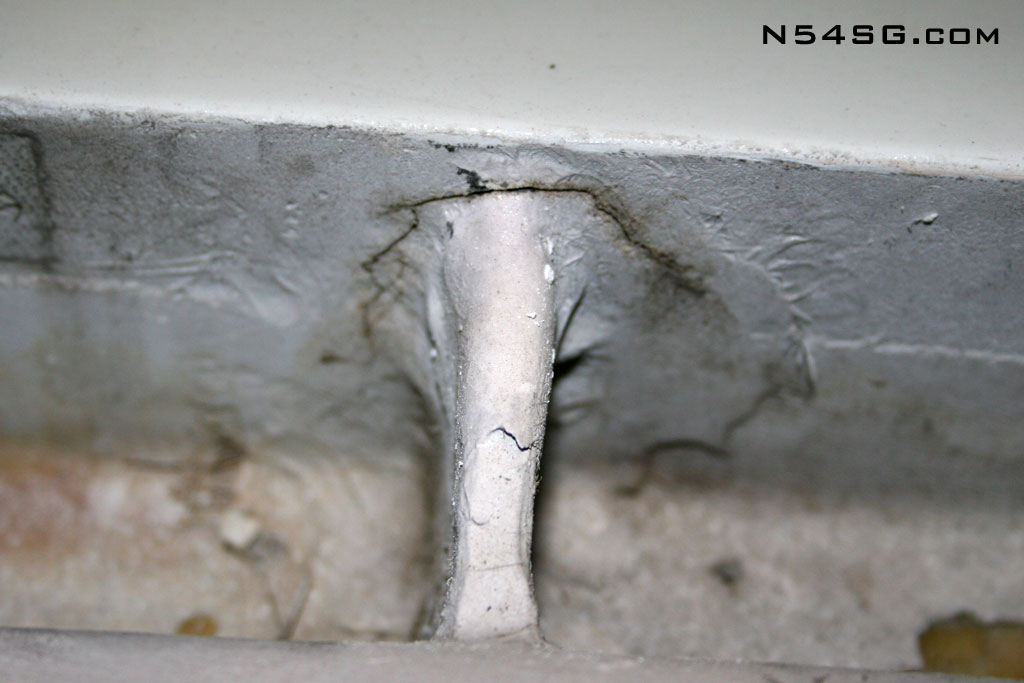
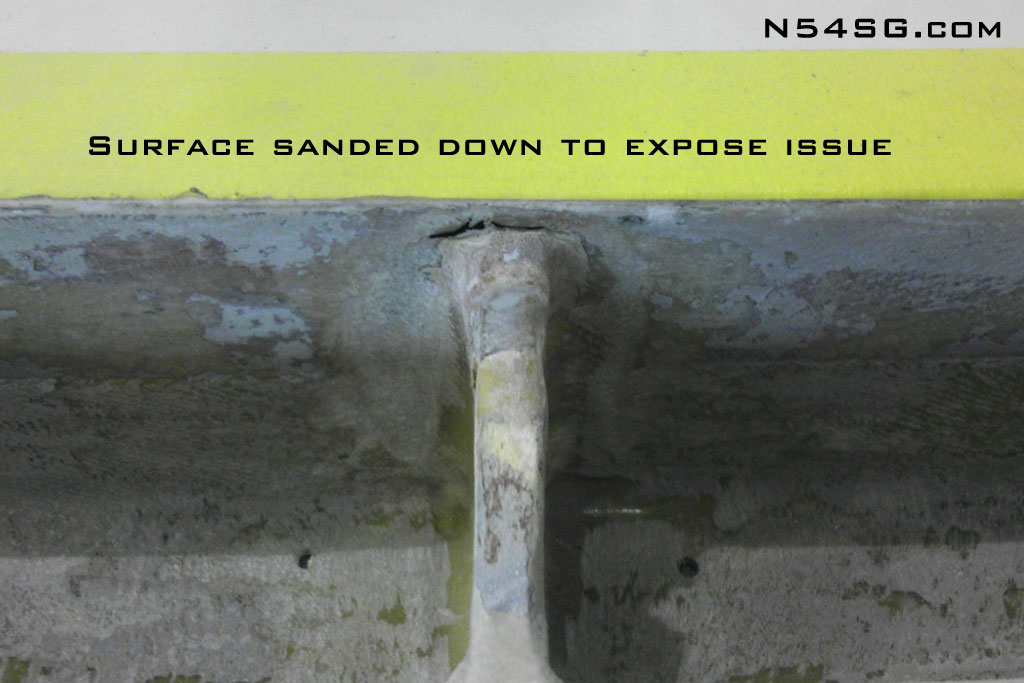
The aileron balance weight is supported by a few gussets to the forward spar of the aileron. My guess is that a combination of poor build quality and probably some sort of vibration associated with worn out hinges led to this gusset cracking. Imagine the weight on a long moment arm vibrating. Gives me the willy’s thinking about it. So I grind out the radius around the gusset and find a big hole. Awesome. Both ailerons had done the same thing at the same place. I repaired it with a 3 BID layer on each side with a nice radius, on ALL of the gussets.
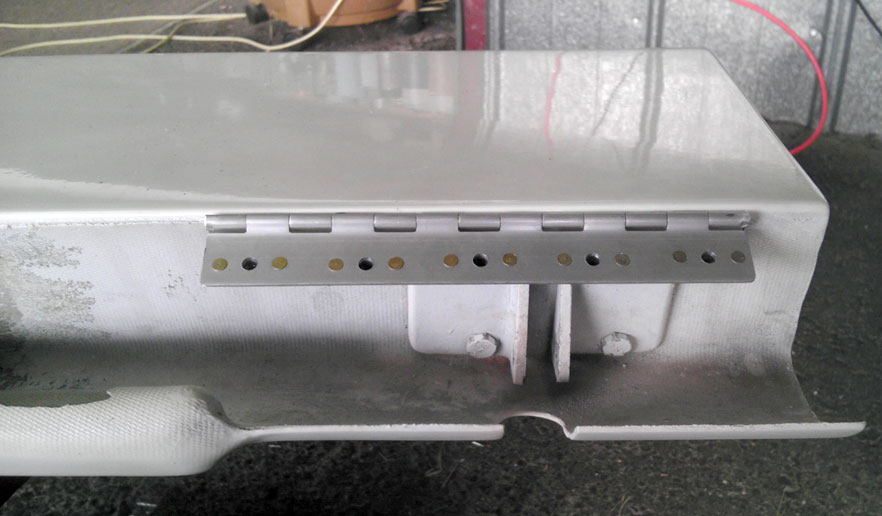
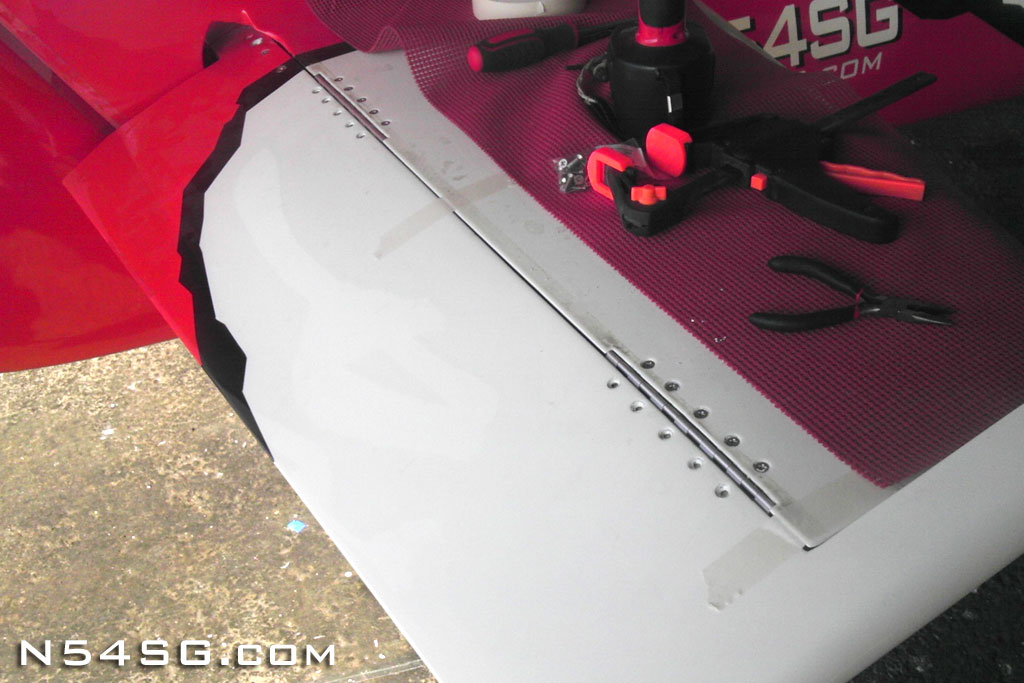
To finish installing the hinges I had to match drill the holes in the hinges to the holes on the airplane or control surface. That’s a lot to line up! Hinges opposite each other had to align so it doesn’t bind up, but also to position the control surface correctly on the wing or elevator. That is a lot of angles to consider when mounting nut plates! Moral of the story, I nailed it. I would separate the hinge halves and use 1 long half of continuous hinge to connect the 2 small halves. This insured the alignment in regards to the hinge travel around the pivot point. Then it was just a matter of hinge location to insure control surface alignment. Hard to explain, and I didn’t take any pictures, so you will just have to imagine it.
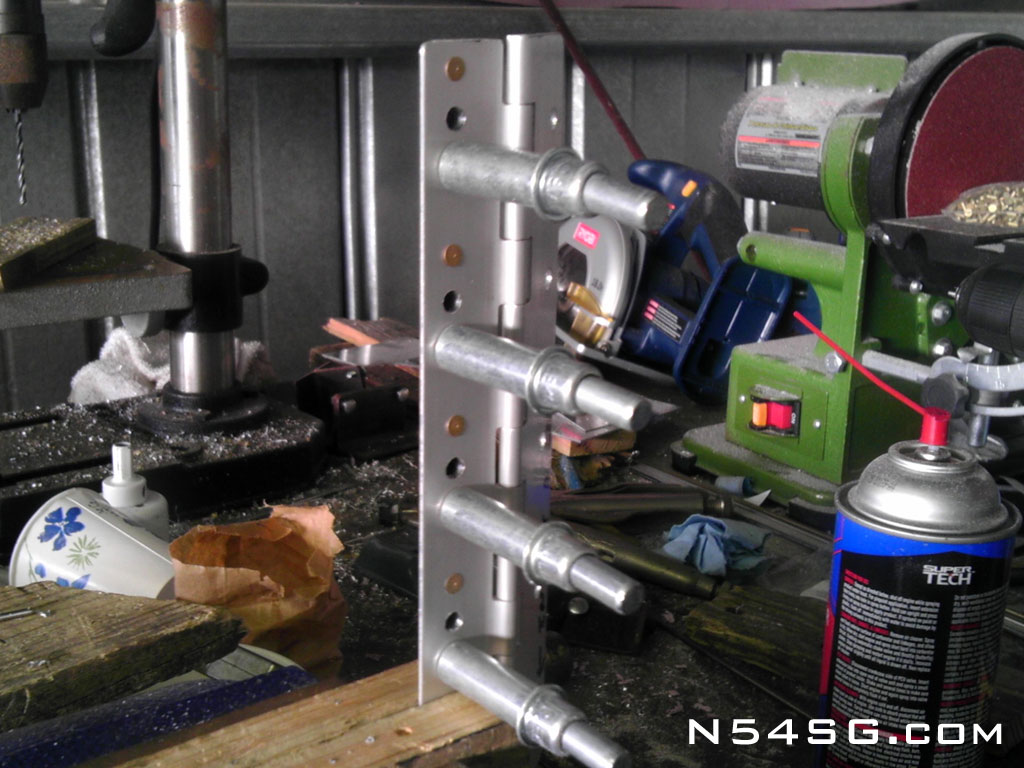
In order to match trill the holes on the control surface I used a small piece of aluminum as a stop. I drilled a hole and put it on a long screw protruding from the airframe side hinge nut plate, securing it with another nut plate finger tight. This piece would let me set the control surface on the hinge, and the hinge would be prevented from swinging out of the way. Kind of locks it in place. With both hinges locked, I could then make sure the control surface (elevator in this case) was aligned properly. I used some masking tape to hold the alignment and then drilled pilot holes for each elevator screw. Genius!


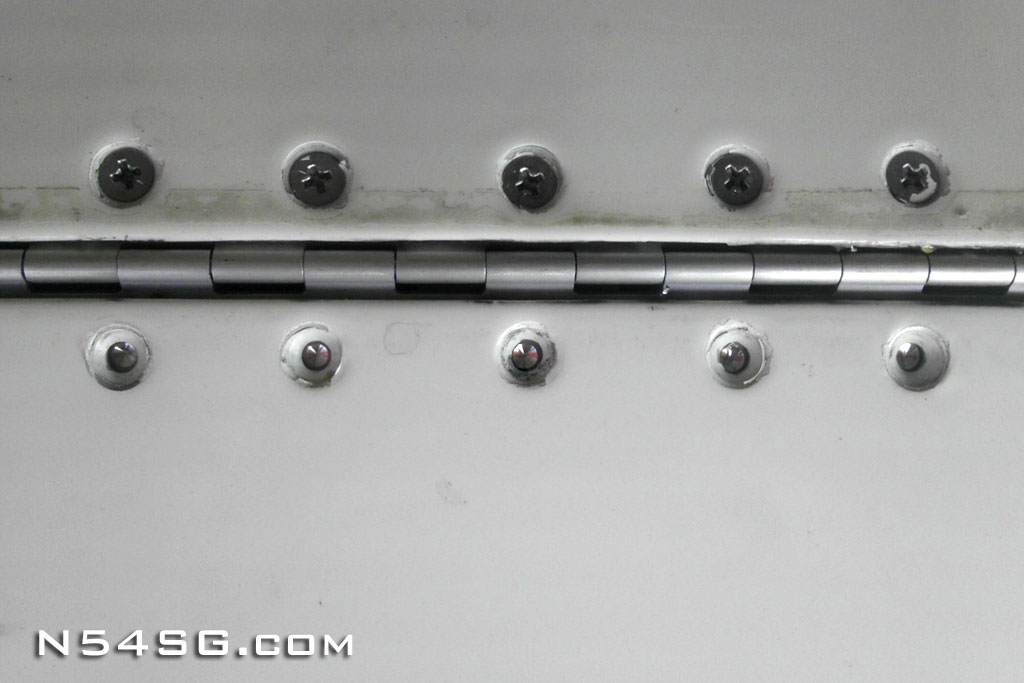
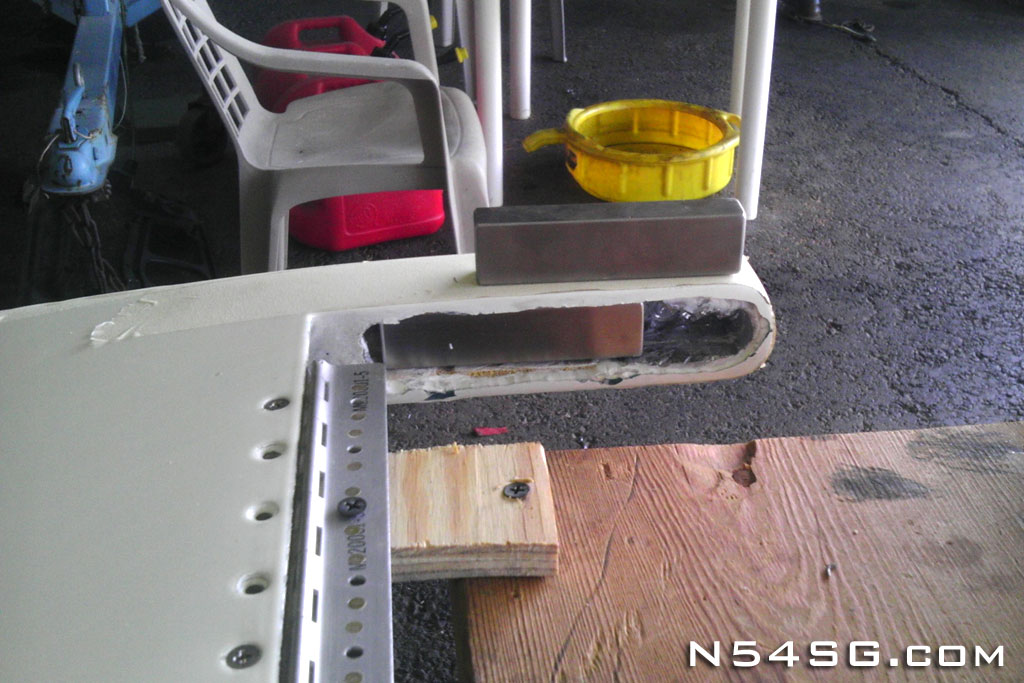
Then after what seemed like a million nut plates, ok maybe not a million, but probably 60 (elevator and ailerons), the hinges were complete. Since I had it all apart, I figured what better time to check the balance of everything. I mounted a few tabs on the work bench and screwed the airframe side of the hinge down and let things go.

You know that feeling when you know you have just survived something very serious. Near miss in your car, losing the front end of your motorcycle on some gravel, a firework with an abnormally short fuse, etc? Chills when through my body as I see the elevator clunk down at the end of its travel, trailing edge low. And I don’t mean barely not balanced, its way off. Then I think back to all the times while testing for Reno that I had the airplane at or near Vne, with worn out hinges, and un-balanced trailing edge heavy control surface. If there were ever a best case scenario for flutter, this was it. For those that don’t know what aerodynamic flutter is, this video pretty much sums it up:
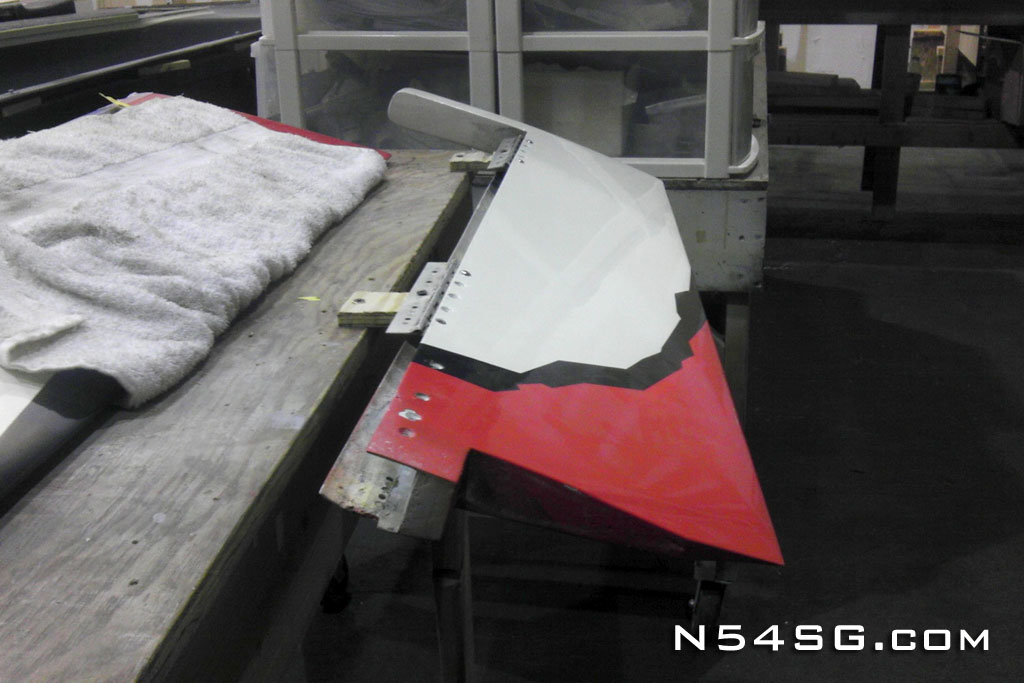
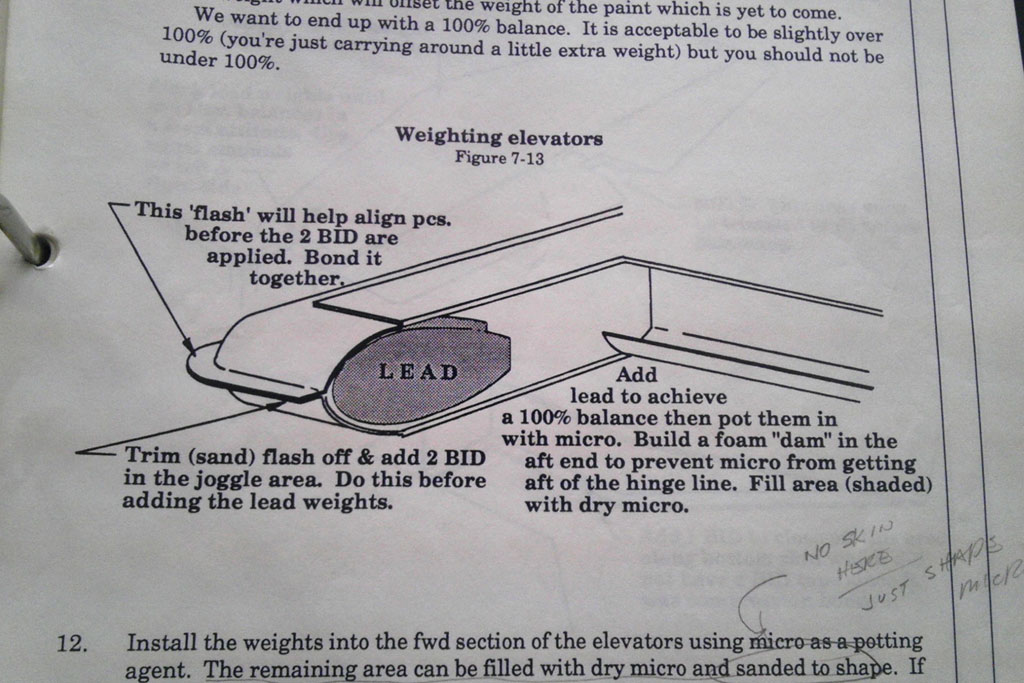
Ok so I’m not dead, let’s call that a win. How do I fix it? The ailerons were also trailing edge heavy but not by much. I attribute that to extra paint. Easy fix was to bolt on a small amount of lead sheet and they were perfect. The elevator has led weights potted in the “horns” of each elevator. The horn is what I call the outer edges of the elevator that extend forward past the hinges. It takes less weight to balance this way, and I also assume some sort of aerodynamic balance occurs as well. The problem is the horn is solid. Partially lead, partially micro, and only the original builder knows where and how much of each. I referred to the original build manual to hopefully get some idea. Well, here it is:

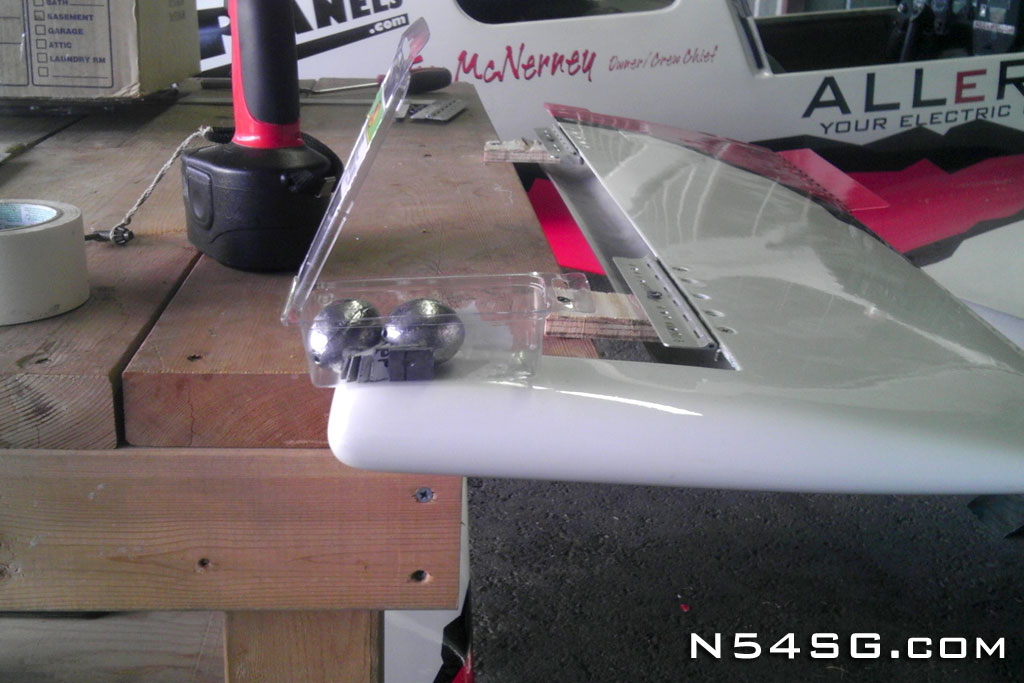
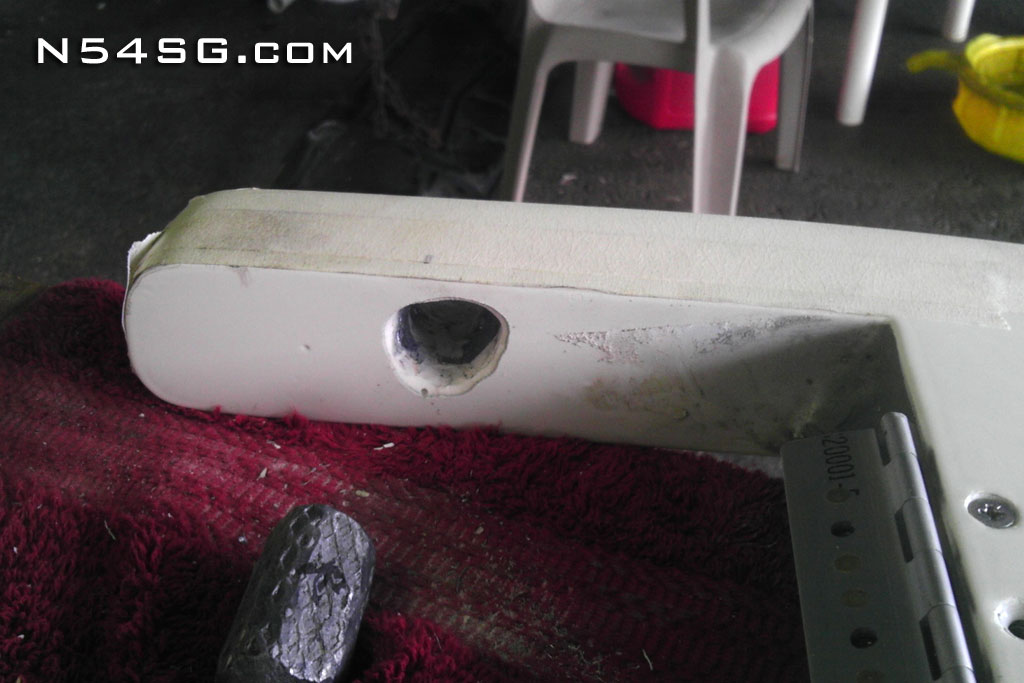
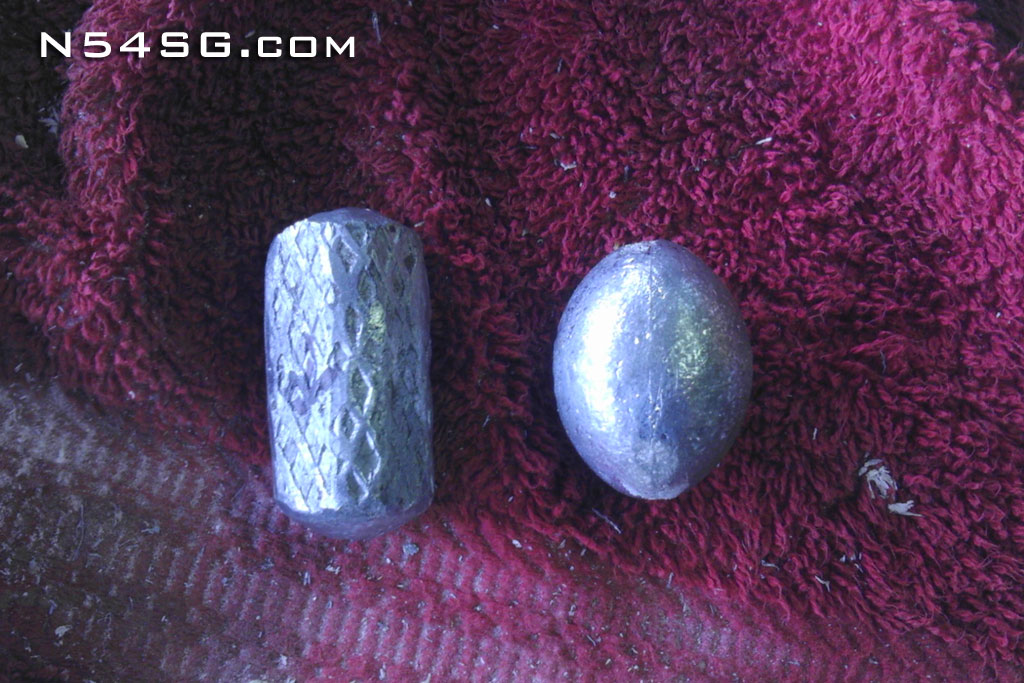
I went to the local bait shop and got some lead weights. Then I went back and got the biggest ones they had! The picture below shows the left elevator (with trim motor and tab) as removed from the airplane. Each of those round balls is 6oz, plus some extra lead scrap. My Wal-Mart drug dealer scale (actually they call it a food scale) showed something like 14 oz of weight at the longest moment arm from the hinge. This is on top of whatever weight is already installed in the horn. Uh oh..

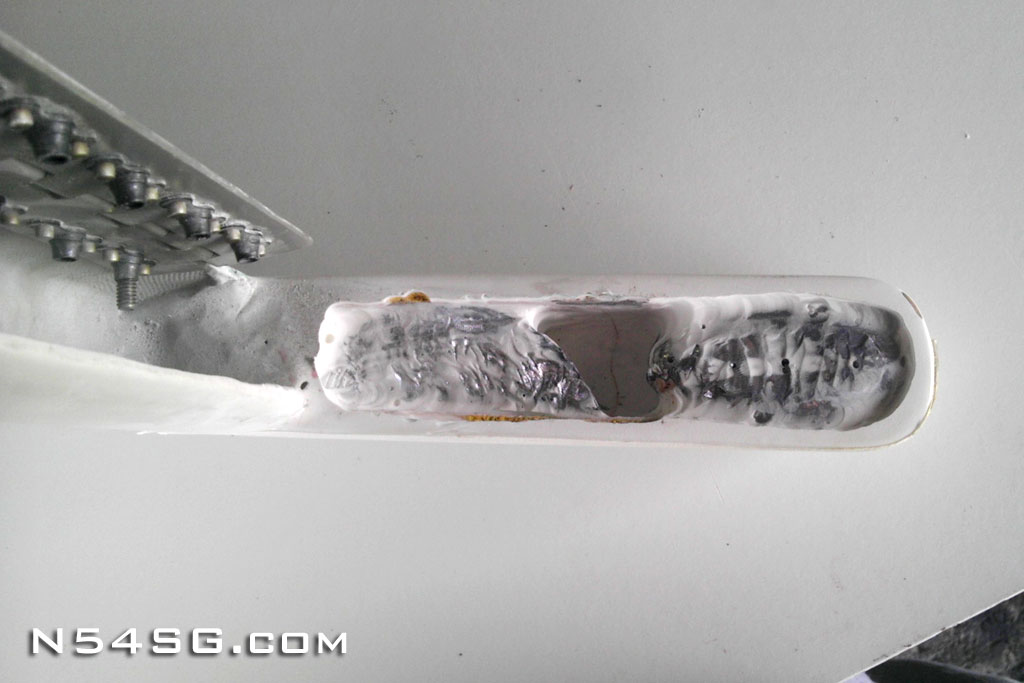
So not knowing how accurate this was, I drilled some small pilot holes to determine where the lead was. Well, what I was finding didn’t match the diagram in the build manual at all! Mine was almost all solid lead! I got out my small grinder and started some prospecting.

Now the real problem. The “horn” was already 85% solid lead. With the remaining 15% of space I couldn’t add enough weight to balance it. Now I was really stumped on a few levels. Then I started thinking back, way back to how this airplane was probably originally designed and built. This small tail never had a trim motor and tab on it, per the plans. Lancair used a spring system in the cockpit that would bias the entire elevator up or down, giving you a trim of sorts. With this system, the “horn” on the elevator didn’t need to be very big as the entire surface was fairly light weight. Somebody along the line of previous owners removed the spring system, and installed an electric trim motor and tab. Ok, that’s great, but they never balanced the assembly!
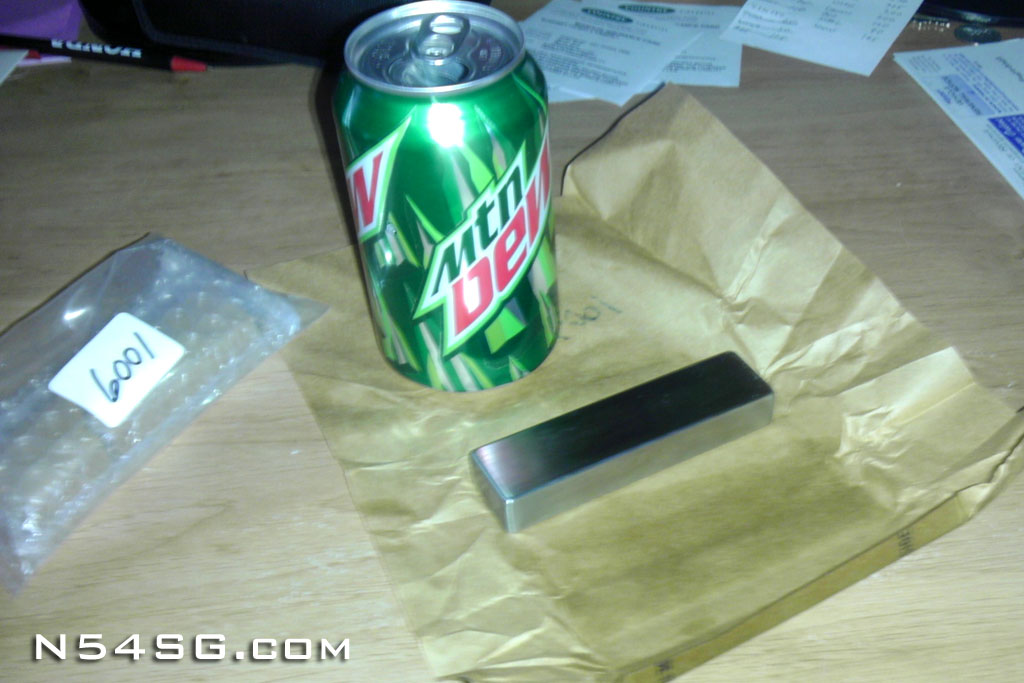
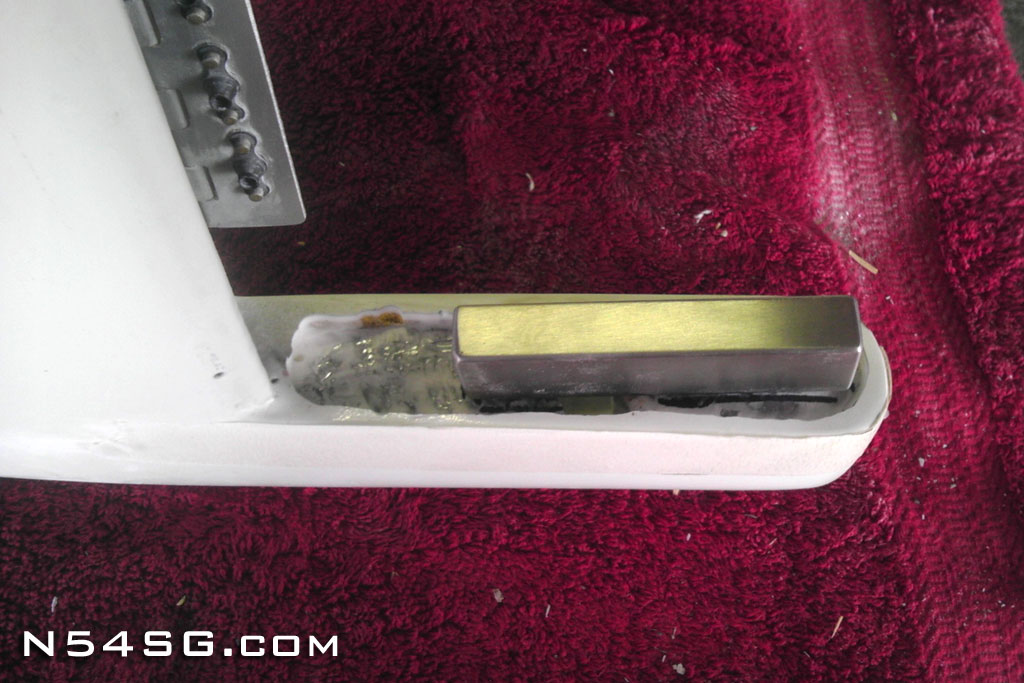
If you have read this far, you’re a dedicated fan. Thank you. So how do I fix this? I need more lead than the given amount of space will allow. Ok, what’s more dense then lead? Tungsten. Tungsten is 1.7 times more dense then lead. This was the only way I could think of to increase weight without increasing the volume. The cheapest way I could get tungsten was to buy a tungsten bucking bar used for smashing rivets in hard to reach places. Avery Tool had this: http://www.averytools.com/prodinfo.asp?number=6001
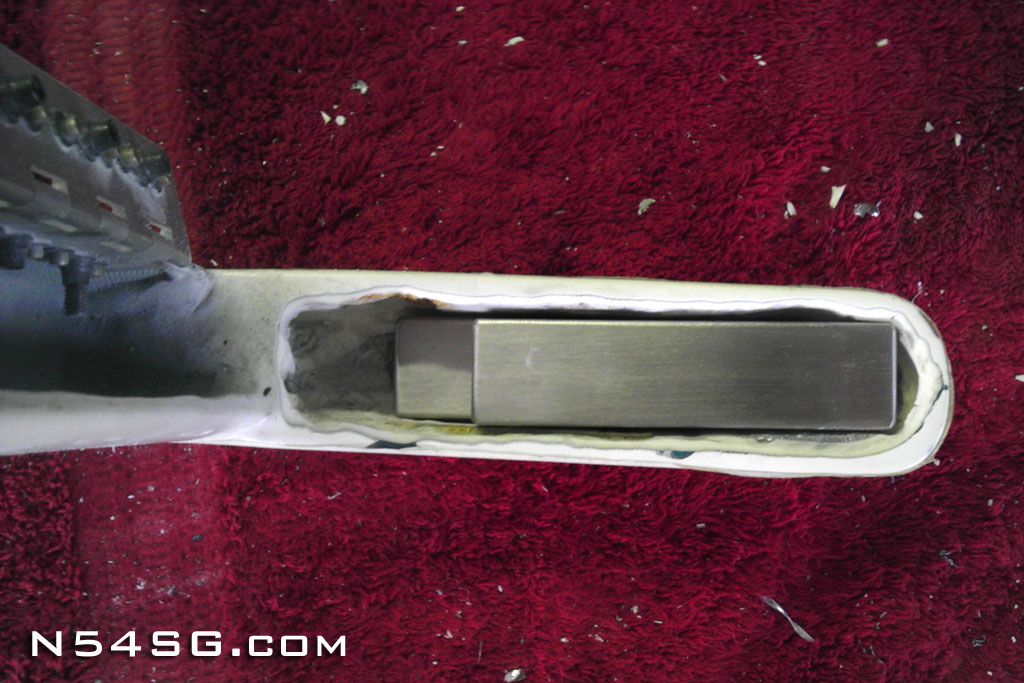
$270 later I have 2 tungsten bars. I figured I would only use 1 and send the other back if I didn’t need it. Well, I was wrong. Once I ground out enough lead to make room for the tungsten, I would need both to balance it. I didn’t want to have to machine one of the hardest metals, so I offset the moment arm of 1 bar to get the required balance weight.


The other elevator didn’t have a servo in it, so it only required about 4oz to balance. Assuming it looked the same inside as the other elevator, I took a guess with some pilot holes and found the same gap in the lead as the other elevator. I formed a led weight to fit the shape, filed it down to weight and potted it in with micro per the manual.


This is the balanced left elevator video:
Long story short, it seems to work great. During my initial flight testing I took the airplane to Vne and attempted to excite flutter in both pitch and yaw. Talk about scary! It performed perfectly with no adverse issues. The noticable difference is the natural centering feel of the stick. There seems to be a softer neutral point compared with the out of balance feel. But, it had been over a year since I flew it with the old setup, so it may just be in my head.